It’s advisable to remove the white protective paper before laser engraving, as this facilitates smoother cutting and engraving processes. However, if you choose to leave the protective paper on, it won’t interfere with the engraving; just ensure it’s securely adhered to prevent any movement during the process. For optimal results, especially with our acrylic materials, we recommend removing the protective white paper after engraving to maintain a pristine surface.
Adhesive
Should I remove the white protective paper from Patch Crafters’ adhesive-backed materials before laser engraving?
Using a Household Iron to Apply Heat-Activated Adhesive on your material
Materials Needed:
Patch Crafters leather, leatherette, or acrylic sheet or pre-cut patch
Heat-activated adhesive backing from Patch Crafters (with built-in paper protection layer)
Household iron (without steam holes if possible)
Clean, flat ironing board or a heat-resistant hard surface
Timer or stopwatch
Step-by-Step Instructions:
A. Applying to a Sheet of Material
- Prepare Your Surface:
- Preheat Your Iron:
- Cut the Adhesive to Size:
- Position the Adhesive:
- Apply Heat:
- Check the Adhesion:
- Allow to Cool:
- Remove the Paper Protection Layer:
B. Applying Directly onto a Pre-Cut Patch
- Prepare Your Patch:
- Cut the Adhesive to Size:
- Position the Adhesive:
- Apply Heat:
- Allow to Cool:
- Remove the Paper Protection Layer:
- Final Inspection:
Pro Tips:
- For thicker materials, increase the heat setting slightly or extend the pressing time by 5-10 seconds.
- Always test the adhesive on a small area first to confirm the heat setting is suitable.
Applying Heat-Activated Adhesive with a Flat Heat Press: A Step-by-Step Guide
Materials Needed:
- Patch Crafters leather, leatherette, or acrylic sheet or pre-cut patch
- Heat-activated adhesive backing from Patch Crafters (with built-in paper protection layer)
- Flat heat press machine
- Timer
A. Applying to a Sheet of Material
1. Prepare Your Heat Press:
Set your heat press to 310°F (154°C). Allow it to preheat fully before use.
2. Cut and Position the Adhesive:
Trim the adhesive backing to match the size of your sheet. Place it adhesive side down on the material, paper-protected side up.
3. Press and Apply Heat:
Close the heat press and apply firm pressure for 10 to 15 seconds.
4. Allow to Cool:
Let the material cool completely before handling.
5. Remove the Paper Protection Layer:
Once cool, gently peel off the paper protection layer to reveal a smooth adhesive surface.
B. Applying Directly onto a Pre-Cut Patch
1. Prepare Your Patch:
Ensure the patch surface is clean and flat.
2. Cut and Position the Adhesive:
Cut the adhesive to match your patch size. Place it adhesive side down, paper-protected side up.
3. Press and Apply Heat:
With your heat press set to 310°F, apply firm pressure for 10 to 15 seconds.
4. Allow to Cool:
Cool the patch completely before peeling.
5. Remove the Paper Protection Layer:
Once cooled, carefully peel off the paper layer.
6. Final Inspection:
Check for smoothness and full adhesive coverage. You’re ready to attach your patch!
Pro Tips:
- Adjust time or pressure slightly for very thick materials.
- Always let your piece cool fully before removing the protective paper to avoid disrupting the bond.
- Testing on a scrap first is a smart way to ensure a flawless finish.
PatchCrafters Adhesive Application Guide for Diverse Materials:
Achieving a flawless application of our specially formulated adhesive across various materials demands a nuanced approach. This guide ensures you can confidently apply our adhesive to materials ranging from soft fabrics to more rigid substances like metal and acrylic.
Preparation Steps for All Materials:
- Surface Preparation: Select a flat, stable work area and cover it with a protective layer such as a silicone mat or a piece of parchment paper. This prevents any potential heat or adhesive damage to the underlying surface.
- Material Orientation: For materials like leather or fabric patches, ensure the design side is facing downwards. Align the adhesive film so that its glossy, reactive side directly contacts the 'reverse' side of your material. For firmer materials (e.g., metal, PVC), ensure they are clean and dry before proceeding.
- Adhesive Alignment: Carefully position the adhesive film on the designated area of your material. Aim to start from the material's midpoint, gently smoothing outwards to the edges to minimize any potential for creasing or air bubbles.
Heat Application:
- Adjust your heat press or iron to the medium-high setting, equivalent to the cotton/linen option for traditional irons, ensuring the steam function is disabled.
- Place the material with the adhesive film applied on your prepared surface, adhesive side facing down.
- Apply heat with a steady, circular motion, starting from the center and spiraling outwards. This method helps evenly distribute the adhesive and secures it across the entire surface without creating wrinkles or bubbles.
Cooling and Finishing Touches:
- After the adhesive has been thoroughly applied, allow the material to cool down at room temperature. Avoid rushing this process to ensure the adhesive sets properly.
- For more rigid materials like acrylic or metal, a gentle pressing under a light weight (like a book) can help maintain flatness and promote better adhesion as it cools.
Special Considerations:
- Leather and Leatherette: These materials require a careful balance of heat to avoid warping or discoloration. If uncertain, test a small, inconspicuous area first.
- Acrylic and Metal Patches: Due to their heat sensitivity and rigidity, apply heat more briefly and ensure they are completely cooled under a weight for optimal flatness.
- Fabric Patches: Ensure the fabric is pre-ironed if necessary to remove any creases before applying the adhesive.
By following these customized instructions, you'll achieve a secure and aesthetically pleasing application on any material. This process has been designed to cater to the diverse nature of the materials you may work with, ensuring each project's success. Our customer support team is always available to provide further assistance or clarify any steps in this guide, ensuring your experience is as seamless and productive as possible.
Adhesive Key Features:
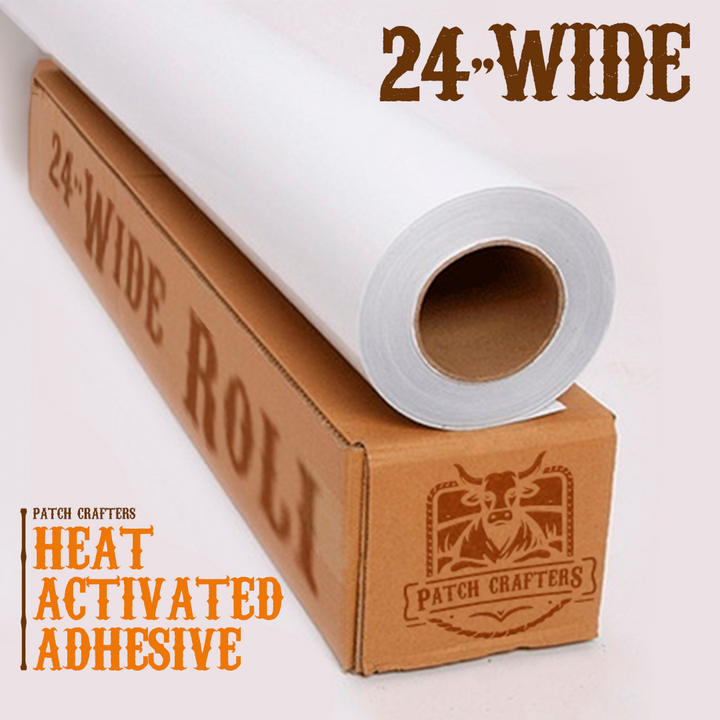
Enhanced Versatility: Ideal for a broader range of materials, including genuine and faux leathers, acrylics, hardwood veneers, and an assortment of laserable substrates. Our 24" width accommodates larger designs and projects, providing more creative freedom.
Generous Size & Precision Thickness: The rolls come in a standard width of 24 inches, perfect for sizable projects, with a consistent thickness of .005" (5mil). Choose your preferred length and unlock limitless project potential.
Peak Performance: Featuring a premium Film Adhesive, the Patch Crafters 24" roll stands as the pinnacle of adhesive technology, melting between 200°F for a solid, enduring application.
Safety First: NON TOXIC and suited for laser cutting and industrial uses, it’s skin safe and laser safe. Remember, this product is intended for industrial use – avoid ingestion or inhalation of fumes.
Durability in Every Condition: Waterproof and resilient against elements such as sweat, labor-intensive work, and various weather conditions, it's perfect for outdoor gear and garments that undergo rigorous use.
Broad Material Compatibility: Seamlessly bonds with a wide array of fabrics and materials, ensuring your projects have the flexibility and strength they deserve. (Refer to our full compatibility list for details.)
Simplified Application: Designed for ease of use, it transforms into a robust, non-tacky adhesive upon heating, suitable for both household irons and professional heat presses. We provide clear instructions for a seamless application process.
How do I know which side of the adhesive sheet has the paper backing?
There are two simple ways to identify the paper-protected side of your adhesive sheet:
Corner Test – Try gently peeling back a corner of the sheet. The clear side is the adhesive, and the white side is the paper backing.
Texture Check – Lightly rub your nail across the surface. The adhesive side will feel rubbery, while the paper side will be smooth and allow your nail to glide over it.
A Message from Patch Crafters:
At Patch Crafters, backed by rigorous testing, we're proud to present the adhesive roll that streamlines your patch application process. Not only does it save time and money by offering an alternative to sewing, but it also allows you to press all shapes and sizes with ease.
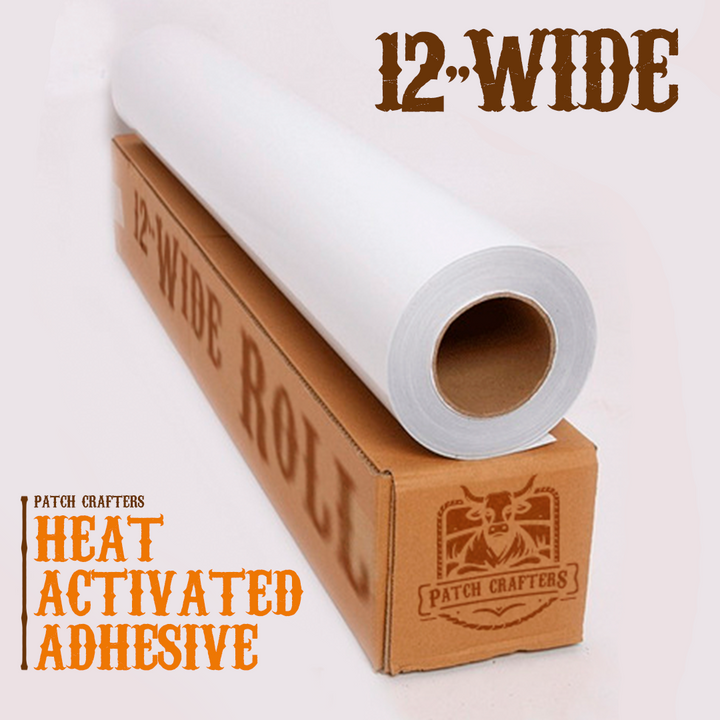
Should you have any questions, our dedicated team is here to help. Contact us anytime for support tailored to your needs. Dive into the world of efficient and reliable patch attachment with Patch Crafters Adhesive Roll 12", and let your creativity soar to new heights!
Acrylic Panel
Introduction
Welcome to your guide on maximizing the potential of PatchCrafters acrylic materials equipped with our premium heat-activated adhesive. This manual is designed to help you achieve flawless applications and stunning results for your projects.
Handling Protective White Paper
The acrylic material comes with a protective white paper on top of the adhesive layer to safeguard it until application. Here’s how to manage this protective layer:
- After Engraving Preference: For optimal results, we recommend removing the protective white paper after engraving. This approach ensures the acrylic's surface remains pristine and undamaged during the engraving process.
- Pre-Removed Paper: If the protective paper has been removed before engraving, proceed with caution. The acrylic can still be engraved successfully, but extra care should be taken to avoid any direct impacts that might compromise its surface quality.
Engraving Guidelines
Achieving the best engraving results on your 1/16" acrylic involves a few key considerations:
- Test and Adjust: Start with a high speed and moderate power setting on your laser engraver, conducting test engravings on scrap material to fine-tune.
- Focus on Quality: Ensure the laser is precisely focused on the acrylic's surface for sharp, detailed results.
- Incremental Approach: Adjust the engraving settings incrementally based on the outcomes of your tests, aiming for a smooth, matte finish.
Applying the Heat-Activated Adhesive
Our acrylic material's heat resistance is a significant advantage, ensuring durability and longevity. However, it also means adjusting your heat application approach:
- Increased Heat Requirement: Apply more heat compared to other materials. The acrylic requires approximately 15 extra seconds of heat to activate the adhesive effectively, ensuring a secure bond.
- Even Distribution: Ensure the heat is evenly distributed across the entire surface of the acrylic to activate the adhesive uniformly.
- Final Application: After applying the necessary heat, allow the acrylic to cool down before handling it further. This cooling period ensures the adhesive sets properly, providing a strong, lasting bond.
Is it normal to see wrinkles on the protective white paper?
Yes, it's normal to observe wrinkles on the protective white paper. These do not affect the quality of the adhesive or the final application.
Can I still engrave the acrylic if the protective paper is removed?
Yes, engraving can proceed without the protective paper, but take care to protect the acrylic's surface during the process.
How do I achieve consistent engraving on acrylic?
Consistent results come from testing and adjusting your machine's settings, focusing on high speed and moderate power, and ensuring the laser is correctly focused for the acrylic's thickness.
How much extra heat does the acrylic need?
The acrylic requires approximately 15 extra seconds of heat compared to other materials to activate the adhesive due to its heat resistance.
How to apply acrylic patches using different types of heat presses?
Applying acrylic patches to hats requires a nuanced approach, especially considering their need for more heat compared to other materials. Below, we outline detailed instructions for both single and double heat plate presses, ensuring your acrylic patches bond securely and seamlessly to your garments.
Single Heat Plate Press (e.g., Vevor):
- Initial Press: Begin by preheating the hat for 30 seconds at 30°F. This step is crucial to prepare the fabric, ensuring it's receptive to the acrylic patch.
- Applying the Patch: Position the acrylic patch on the preheated section and apply the press again for 45 seconds at 300°F. This targeted heat application activates the adhesive, ensuring a solid bond with the fabric.
Double Heat Plate Press (e.g., Hotronix 360 IQ, Chinese Model):
- Option 1: Adjust the top plate to 260°F-270°F°F and the bottom plate to 320°F-330°F. Press with medium pressure for 40 seconds. This method provides a consistent and efficient bond across the entire patch.
- Option 2 (Double Press Method): Initially, heat the patch area for 30 seconds to activate the adhesive slightly. Then, position the acrylic patch and apply a second round of heat for 35 seconds. This staggered heating process can further enhance the adhesive's effectiveness.
Important Considerations:
- It's imperative to ensure the acrylic patches are completely dry before application. Moisture can significantly impact the effectiveness of the heat transfer.
- If the patch does not adhere properly after the initial application, it may indicate a need for increased heat. Adjust the heat settings or pressing time accordingly, based on your observations.
By adhering to these guidelines, you are set to achieve a high-quality, durable application of acrylic patches on hats. The success of applying acrylic patches hinges on the precision of heat settings and application timing, specifically adjusted for the heat-resistant nature of acrylic. Should you face any challenges or have further inquiries about your heat press model, our dedicated customer support team is on standby to offer expert guidance and assistance.
What is the best way to clean acrylic patches after engraving?
One of the most effective methods we've found for cleaning engraved acrylic patches involves using isopropyl alcohol. This solvent is excellent for cleaning because it does not react with the acrylic, ensuring that the material remains undamaged. To achieve the best results, apply a small amount of isopropyl alcohol to a paint brush and gently rub the engraved areas. This technique helps remove any dust or residue embedded in the engravings, restoring the acrylic's shiny and vibrant appearance.
For an additional touch of care and to enhance the look of your acrylic patches, we recommend applying a protectant after cleaning. A product like MEGUIAR'S® 15812 Ultimate Black Plastic Restorer or any other automotive protectant is ideal. This protectant not only gives the acrylic a deeper color and lasting shine, but it also protects against the elements, enduring through washing and rain for weeks. This combination of cleaning with isopropyl alcohol followed by the application of a quality protectant will ensure your acrylic patches look pristine and well-maintained.
How can I adjust my engraving settings for the best results on acrylic?
When working with acrylic, achieving that pristine, frosted appearance characteristic of laser engraving involves a careful balance of your machine’s settings. Begin with your engraver's recommended baseline settings for acrylic materials. The goal is to adjust these settings to prevent the material from melting while ensuring the engraved design is crisp and clear.
- Speed and Power Balance: Start with a higher speed setting and a moderate power level. This combination aims to engrave the surface without generating excessive heat that can lead to melting or warping.
- Incremental Adjustments: Conduct test engravings on a piece of acrylic scrap. Adjust the power and speed incrementally, noting how each change affects the quality of the engraving. You’re looking for settings that leave a smooth, matte finish without altering the acrylic's flat surface.
- Observation and Fine-tuning: Pay attention to the clarity and depth of each test engraving. The optimal settings should achieve your desired effect without compromising the material’s integrity or appearance.
- Consistent Focus: Ensure the laser's focus is precisely adjusted. A properly focused laser is crucial for achieving detailed and sharp engraving results.
By methodically testing and adjusting, you’ll identify the perfect settings for engraving on acrylic with your specific machine. This tailored approach ensures that each project reflects the high quality and precision your work is known for, without being constrained by the variability of preset machine settings.
How to effectively cut white acrylic with diode laser machines?
Cutting white acrylic with a diode laser machine poses unique challenges due to the color's high reflectivity, which causes most of the laser light to be reflected away instead of being absorbed by the material. Here are some strategies to enhance your cutting results:
- Adjust Laser Settings: Increase the power and decrease the speed of your laser machine. This allows the laser to deliver more energy to the material, compensating for the lack of absorption.
- Use Multiple Passes: Instead of attempting to cut through the acrylic in one go, try several passes with the laser at lower power settings. This method helps prevent burning and ensures a cleaner cut over time.
- Change the Base Color: Place the white acrylic on a darker surface. This might help absorb some of the laser light that passes through the acrylic, reflecting it back and aiding in the cutting process.
- Apply a Protective Coating or Dyes: Temporarily adding a dark dye or a protective coating that can absorb laser light to the surface of the white acrylic may significantly improve cutting efficiency. Ensure any materials used are safe and do not produce toxic fumes when laser-cut.
- Consider Alternative Lasers: Diode lasers may not always be the best tool for cutting white acrylic due to their light wavelength. A CO2 laser, which operates at a different wavelength, is generally more effective at cutting light-colored acrylics and might be a better choice for regular use.
- Testing is Key: Always experiment with these techniques on scrap pieces first to determine the most effective settings and methods for your specific project needs without wasting material.
By understanding these limitations and adjusting your approach, you can enhance the cutting performance of diode lasers on white acrylic, though it may still require some experimentation to find the perfect settings. If precise cuts on white acrylic are frequently needed, investing in or using a CO2 laser might be the most reliable solution.
Are there any toxic fumes released when engraving acrylic sheets?
Our acrylic sheets are engineered to ensure safety during engraving, and they do not produce toxic fumes. However, the process can emit a noticeable odor, which some may find unpleasant. To ensure a comfortable and safe working environment, we strongly recommend conducting all engraving activities in a well-ventilated area. Additionally, using an effective fume extraction system can greatly reduce the presence of odors and enhance overall air quality in your workspace. Following these safety guidelines will help manage any odors produced while keeping your crafting area safe and pleasant.
Leatherette Sheet
What is the recommended method for attaching leatherette patches to garments using a heat press?
For optimal application of leatherette patches on hats, it's crucial to adjust your technique based on the type of heat press you're using. Below, we provide tailored instructions for both single and double heat plate presses, ensuring your patches adhere perfectly to the garment.
Single Heat Plate Press (e.g., Vevor):
- Initial Press: Start by pressing the hat for 30 seconds at 300°F. This initial layer of heat prepares the fabric for the patch application.
- Applying the Patch: Place the leatherette patch on the pre-heated area and press again at 300°F for 25 seconds. This ensures the patch adheres well to the garment.
Double Heat Plate Press (e.g., Hotronix 360 IQ, Chinese Model):
- Option 1: Set the top plate to a temperature between 270°F and 290°F and the bottom plate to between 380°F and 400°F. Apply medium pressure for 45 seconds. This single-step method is efficient for a strong bond.
- Option 2 (Double Press Method): For an alternative approach, first apply heat for 30 seconds to warm up the patch area. Then, place the patch and apply a second round of heat for 20-25 seconds. This method can enhance the adhesive's activation.
Important Notes:
- Ensure the patches are completely dry before application. High moisture levels can affect the heat transfer process.
- If the patch doesn't stick after the first heat application, it may require a bit more heat. Adjust accordingly based on your initial results.
Are there better results engraving metal backing leatherette with a fiber laser compared to a CO2 laser?
Understanding the Lasers:
CO2 Lasers:
Technology: CO2 lasers use a gas mixture (predominantly carbon dioxide) stimulated electrically to produce a laser with a wavelength of about 10.6 microns. This type of laser is highly effective on non-metal materials.
Engraving Characteristics: CO2 lasers are excellent for a broad range of non-metal materials including leather, wood, and plastics. They provide high-quality engravings with fine detail on leatherette. However, they can struggle with consistency when used to engrave leatherette with metal backing, as they are not inherently suited for metal interaction.
Fiber Lasers:
Technology: Fiber lasers use an optical fiber doped with rare-earth elements, generating a laser beam at about 1.06 microns, significantly shorter than that of CO2 lasers.
Engraving Characteristics: Fiber lasers are particularly precise in their ability to remove the top layer of materials without affecting underlying layers. In the context of leatherette with a metal backing, fiber lasers can finely remove the leatherette layer, precisely exposing the metal backing without physically engraving the metal itself.
Comparing Results on Metal Backing Leatherette:
Exposing Metal Backing: Fiber lasers are ideally suited for projects where the goal is to expose the metal backing of leatherette. They do this by precisely and cleanly removing the top layer of leatherette, revealing the metal beneath with excellent accuracy and minimal damage to the metal.
Precision and Consistency: Fiber lasers provide a consistent result when exposing the metal backing through the leatherette, which can be challenging with CO2 lasers. CO2 lasers, while excellent for engraving leatherette itself, can produce less consistent results when trying to expose the metal backing due to their lack of precision in depth control.
Which Laser to Choose?
Project Requirements: If the primary goal is to create detailed designs by precisely exposing the metal backing under leatherette, a fiber laser is more suitable. It ensures cleaner, more consistent results without the risk of irregularities that might occur with a CO2 laser in such specific applications.
Overall Performance: For general engraving on leatherette without metal backing, a CO2 laser remains an excellent choice. However, for composite materials like leatherette with a metal backing where precise layer removal is required, the fiber laser's capabilities make it the superior option.
In summary, while both types of lasers have their strengths, fiber lasers are particularly adept at projects involving leatherette with a metal backing where precision in exposing the metal is crucial. Their ability to finely remove the top layer without altering the metal underneath provides enhanced results and greater control over the final appearance of the engraved product.
How should I determine the optimal engraving settings for leatherette?
When engraving leatherette, the key is to start with your machine's recommended settings for synthetic materials and adjust from there. Begin with a moderate speed and a low to medium power level to prevent burning or excessive melting. Conduct a series of test engravings on a scrap piece of leatherette, gradually adjusting the power and speed until you achieve a clear, sharp engraving without damaging the material. Pay attention to the contrast and depth of the engraving, aiming for a balance that highlights your design while preserving the integrity of the leatherette.
How to Achieve Consistent Engraving on Leatherette with Metal Backing?
Achieving consistent quality in the engraving of leatherette materials, especially those with a metal backing, requires careful attention to detail in both preparation and the engraving process itself. Here are the steps to mitigate inconsistency and enhance the precision of your engravings:
- Group Engraving Strategy: When setting up your engraving rows, opt for the "fill groups together" option rather than engraving each row individually. This method promotes uniformity across the engraving area by maintaining consistent engraving conditions for each group.
- Adjusting Focus: Slightly defocusing the laser by approximately 1/8" can significantly reduce inconsistencies in the engraving depth and coloration. This adjustment broadens the laser's impact area, leading to a more uniform application across different parts of the leatherette.
- Leveling the Material: Ensuring that the material is perfectly level relative to the laser nozzle is crucial. The entire surface of the leatherette, especially with a metal backing, must be equidistant from the laser to maintain a consistent focal range throughout the engraving process. This step is paramount, as even minor discrepancies in focal range can lead to notable variations in the quality of the engraving.
- Understanding Power Variations: Be mindful of the laser power settings. Even slight adjustments in power (as minimal as 1%) can transition the appearance from shiny to dull, underscoring the sensitivity of the material to these changes. This sensitivity illustrates how critical precise control over the laser's power is to achieving the desired finish.
- Focal Distance Considerations: Just as variations in power settings can have a pronounced effect on the outcome, alterations in the focal distance between the laser and the material play a similar role. Ensuring a stable and consistent focal distance is key to avoiding the common pitfalls seen in engraving projects.
- Practice and Precision: Dialing in the exact settings for two-tone leatherette requires practice and a keen eye for detail. Since each material can respond differently, it's advisable to test these settings on a sample piece before proceeding with the final project.
By incorporating these steps into your engraving process, you will significantly reduce the risk of inconsistencies and enhance the overall quality of your engravings on leatherette with metal backing. Remember, the goal is not just to achieve a level surface in the traditional sense but to ensure that the engraving surface is uniformly level in relation to the laser's nozzle, thereby guaranteeing a consistent focal range across the entire piece.
Are there any toxic fumes released when engraving leatherette materials?
We understand the importance of safety in your crafting projects, which is why we assure our customers that no toxic fumes are released when engraving our leatherette materials. Our leatherette is specifically designed to be laser-cut and engraved safely, without the emission of harmful toxins. This makes it an excellent choice for both hobbyists and professionals seeking a reliable and safe material for their creative endeavors. As always, we recommend engraving in a well-ventilated area to ensure the best working environment. Enjoy crafting with peace of mind knowing that your health and safety are protected.
Can I use a diode laser to cut and engrave leatherette materials without any problems?
Absolutely! Diode lasers are fully capable of both cutting and engraving our leatherette materials efficiently and precisely. When setting up your diode laser, it’s important to adjust the laser settings to suit the specific thickness and color of the leatherette to achieve the best results.
For cutting: Start with moderate power settings and adjust based on the material’s response. Perform a test cut to ensure that the laser cleanly slices through the leatherette without burning or leaving ragged edges.
For engraving: Lower the power and increase the speed to etch designs into the leatherette without penetrating through the material. Testing different settings will help you find the perfect balance for detailed and crisp engravings.
Please note that diode lasers may struggle with certain colors, such as those with reflective or metallic backings like our black/silver leatherette. In some cases, cutting these colors may not be possible, even with adjustments to power and speed settings. We recommend using an alternative cutting method for these materials if needed.
Always make sure your laser is properly focused, and the leatherette is securely flat on the cutting bed to maintain consistency across your project. With proper setup and adjustment, diode lasers provide excellent versatility and precision for both cutting and engraving leatherette, enabling you to create detailed and high-quality designs.
Why is there a white backing color showing on my leatherette after engraving, and is this normal?
Seeing a white backing color appear on your leatherette after engraving can be surprising, but it is a common occurrence when the laser power is not set high enough to penetrate the top layer completely. This effect results from the laser lightly etching the surface without fully exposing the underlying darker layer, which is typically what you aim for in a finished product.
To help you find the ideal power setting for your engraving projects, conducting a material test is highly recommended. As demonstrated in the material test image provided by one of our customers, adjusting the laser's power creates a gradient effect from white to fully exposed black. Starting at lower power and gradually increasing, you can visibly observe how the laser transitions from etching the surface to revealing the darker material beneath. This test is an excellent method for determining the minimum power required to achieve your desired engraving depth and color.
Material Test Example: The included image shows a clear gradient of color change, indicating different power settings. Notice how the lighter areas represent insufficient power, resulting in an incomplete transition through the leatherette's top color layer, while the darker areas show successful exposure of the underlying material.
Using this approach allows you to dial in the perfect settings for your specific leatherette material, ensuring that every engraving comes out with the clarity and depth you desire. Remember, each laser machine may behave slightly differently, so these tests are crucial for achieving consistent and professional results in your crafting projects.
Should I remove the white protective paper from Patch Crafters’ adhesive-backed materials before laser engraving?
It’s advisable to remove the white protective paper before laser engraving, as this facilitates smoother cutting and engraving processes. However, if you choose to leave the protective paper on, it won’t interfere with the engraving; just ensure it’s securely adhered to prevent any movement during the process. For optimal results, especially with our acrylic materials, we recommend removing the protective white paper after engraving to maintain a pristine surface.
Mastering Airflow to Keep Your Laser Lens Clean and Minimize Smoke Residue on Leatherette
Maintaining proper airflow during laser engraving is essential not only for achieving cleaner results on leatherette but also for protecting your laser lens from smoke and debris buildup. By keeping a minimum, controlled airflow, you can prevent residue from settling on your material and extend the life of your laser equipment.
Why Control Airflow?
Controlling airflow is key to reducing smoke residue on leatherette and keeping your laser lens free from debris. Too much airflow can push smoke toward the material, leaving unwanted residue, while too little airflow can allow debris to accumulate on the lens, reducing engraving quality and potentially damaging the machine. Finding the perfect balance ensures a clean finish and optimal laser performance.
Step-by-Step Instructions:
- Understand Your Laser Machine’s Air Assist System:
- Start with Minimum Airflow:
- Run a Test Engraving:
- Gradually Adjust Airflow:
- Monitor Airflow Direction:
- Optimize Other Engraving Parameters:
- Use a Fume Extractor or Ventilation System:
- Clean Your Machine Regularly:
- Fine-Tune Settings with Additional Tests:
Pro Tips:
- Adjust the Air Nozzle Position: Experiment with the angle and position of the air assist nozzle to ensure airflow clears debris without directing smoke onto the material or lens.
- Maintain a Consistent Airflow: Aim to maintain a steady airflow that is just enough to keep the lens clear of debris. Too much airflow can push smoke back onto the leatherette.
- Regularly Inspect the Lens: Frequently check the laser lens for any signs of smoke residue or debris. Keeping the lens clean ensures high-quality engraving and extends the life of your machine.
- Monitor Ambient Conditions: Ensure that external airflow sources (like fans or open windows) are not affecting your laser’s air assist performance.
By mastering airflow control, you can minimize smoke residue on leatherette, maintain a clean laser lens, and achieve consistently sharp, high-quality engravings!
Effortlessly Remove Smoke Residue from Leatherette After Engraving
Materials Needed:
- Soft microfiber cloth
- LA's Totally Awesome Cleaner
- Isopropyl alcohol (70% or higher) (alternative)
- Mild dish soap (alternative)
- Distilled water
- Soft-bristle brush or old toothbrush
- Cotton swabs (for small or detailed areas)
- Leatherette conditioner (optional)
Step-by-Step Instructions:
- Prepare Your Cleaning Area:
- Gently Brush Off Loose Debris:
- Select Your Cleaning Solution:
- Dampen the Microfiber Cloth:
- Wipe the Engraved Area:
- Focus on Detailed Areas:
- Remove Excess Moisture:
- Repeat if Necessary:
- Condition the Leatherette (Optional):
- Allow to Air Dry:
Additional Tips:
- Adjust Air Assist on Your Laser Machine: To minimize the amount of smoke residue, limit the air assist on your laser machine. Reducing the airflow helps prevent the smoke from being pushed toward the leatherette, which can cause more residue or staining. Experiment with the settings to find the optimal balance that clears debris without directing smoke onto the material.
- Test Before You Clean: Always test LA's Totally Awesome Cleaner or any other solution on a small, inconspicuous area first to ensure it does not cause discoloration or damage.
- Use Minimal Pressure: When wiping, apply minimal pressure to avoid scratching the leatherette.
- Clean Promptly: Clean the smoke residue as soon as possible after engraving to make removal easier and prevent it from setting.
- Regular Maintenance: Regularly dust and clean leatherette items to keep them looking their best and extend their life.
By following these steps and adjusting your laser settings, you can effectively minimize smoke residue and easily clean any that remains, ensuring a professional and pristine finish on your leatherette patches!
Full Grain Leather
What is the recommended method for applying leather patches using a heat press?
When working with leather panels that come with PatchCrafters adhesive already applied, the application process is simplified, ensuring a secure and aesthetically pleasing finish on your custom hats. Follow the instructions below, tailored to the type of heat press you are using, to achieve the best results.
Single Heat Plate Press (e.g., Vevor):
Important Advisory: Due to the thickness of our premium leather panels, single heat plate press machines may struggle to fully activate the adhesive. The leather acts as an insulator, reducing heat transfer from the top plate. For optimal results, we recommend testing your press settings and adjusting them as needed to ensure sufficient heat reaches the adhesive.
Initial Press: Press the hat for 45 seconds at 300°F to prepare the fabric, ensuring it is ready for the adhesive to bond.
Applying the Panel: Position the leather panel where you want it on the hat. Apply the heat press again at 300°F for 45 seconds. Check the bond and if necessary, repeat for an additional 10-15 seconds or increase the pressure to help compensate for the heat insulation.
Pre-heat the Bottom Plate: To improve heat distribution, we recommend pre-heating the bottom plate for 4 minutes before you begin. Simply press the machine without any garment or panel in place. This allows the foam to absorb heat, compensating for the top plate's limited ability to penetrate thicker leather panels.
Double Heat Plate Press (e.g., Hotronix 360 IQ, Chinese Model):
- Option 1: Adjust the top plate to between 270°F and 290°F and the bottom plate to between 300°F and 320°F. Press with medium pressure for 45 seconds. This method is effective for a strong and even bond.
- Option 2 (Double Press Method): First, apply heat for 30 seconds to preheat the area. Then, place the leather panel and apply a second heat application for 20-25 seconds to secure the panel in place.
Important Considerations:
- The patches should be completely dry before application. Moisture can interfere with the effectiveness of the adhesive.
- If the panel does not adhere properly after the first press, it may need slightly more heat. Adjust the temperature or duration as necessary based on your initial outcome.
These guidelines are designed to facilitate a seamless application process for our leather panels with pre-installed adhesive, ensuring your custom hat projects are both enjoyable and successful. As always, should you need further assistance or have questions about your specific project, our dedicated customer support team is here to provide personalized support and advice.
What approach should I use to find the correct engraving settings for leather?
Genuine leather varies greatly in its reaction to laser engraving, so finding the right settings involves experimentation. Start with your machine's settings for organic materials as a baseline. Use a low power setting initially, as leather can burn easily, and increase power incrementally during your tests. Speed settings should be adjusted based on the power adjustments to achieve the desired effect, whether it's surface marking or a deeper cut. Always test on a piece of leather similar to your project material, adjusting for the leather's color, thickness, and type. Observing the effects of these adjustments will guide you to the perfect settings for your specific leather.
Do engraving full-grain leather panels produce toxic fumes?
Engraving our full-grain, vegetable-tanned leather panels does not produce toxic fumes. Our leather is 100% vegetable-tanned, a method that uses natural materials such as tree bark and other plant sources, making it environmentally friendly and safe for engraving. Unlike chrome-tanned leather, which uses chemicals such as chromium salts and can release harmful substances when heated, vegetable-tanned leather is safer and retains the natural beauty of the hide.
Educational Point: Chrome tanning is a quicker and more chemical-intensive process, providing softer leather with a wide range of colors, but it can be less eco-friendly. Vegetable tanning, on the other hand, is an age-old tradition that results in a more natural and durable leather with rich patinas that develop over time. This method is generally recognized for its minimal environmental impact and the distinctive quality it imparts to the leather.
Safety Recommendations: While our vegetable-tanned leather is safer to engrave than chrome-tanned varieties, we still recommend engraving in a well-ventilated area to ensure comfort and safety. Using proper ventilation systems will help maintain a pleasant working environment and ensure that any odors produced during the engraving process are effectively managed.
What is the difference between chrome-tanned and vegetable-tanned leather, and how does this affect the engraving process?
Tanning Methods and Their Differences:
- Chrome Tanning:
- Process: Chrome tanning uses chromium salts and other chemicals to treat the leather. This method is relatively fast, taking about a day to complete, and is popular for its ability to produce soft, uniformly colored leather with high water resistance.
- Characteristics: The leather is more supple and pliable compared to vegetable-tanned leather. It is available in a wide range of vibrant colors and has a more uniform appearance.
- Environmental Impact: While effective, chrome tanning is less environmentally friendly due to the use of heavy metals and other chemicals, which can be harmful if released into the environment.
2. Vegetable Tanning:
- Process: Vegetable tanning is an ancient and natural method that uses organic materials like tree bark, leaves, and other plant-based sources. This process is much slower, typically taking several weeks to months to complete.
- Characteristics: Vegetable-tanned leather is stiffer and can develop a rich patina over time, enhancing its aesthetic appeal. It is known for its earthy tones and natural look, and it tends to be thicker, providing a robust material for products.
- Environmental Impact: This method is considered more environmentally friendly and sustainable, largely avoiding harmful chemicals. It’s preferred for its lower environmental impact and the biodegradable nature of its waste products.
Impact on Engraving:
- Engraving Chrome-Tanned Leather:
Due to the chemical treatment and softer nature of chrome-tanned leather, engraving can sometimes lead to less precise edges, potential hardening or warping due to heat, and occasionally toxic fumes due to the breakdown of chemicals like chromium compounds, especially if the leather is not properly managed or of lower quality.
- Engraving Vegetable-Tanned Leather:
Vegetable-tanned leather offers a more stable and consistent surface for engraving, resulting in cleaner and more precise cuts. The natural fibers and absence of harsh chemicals generally make it safer to work with during the engraving process, as it does not produce harmful fumes. The robustness of vegetable-tanned leather allows for deeper and more detailed engravings without compromising the integrity of the leather.
Conclusion:
Choosing between chrome-tanned and vegetable-tanned leather for projects involving engraving depends on your specific needs for the final product's aesthetics, durability, and environmental considerations. For engraving, vegetable-tanned leather is generally preferred due to its superior response to the process and its environmental benefits.
What is the Difference Between Full Grain Leather, Genuine Leather, and Other Leather Varieties?
1. Full Grain Leather:
- Description: Full grain leather is the highest quality leather available. It is made from the outermost layer of the animal hide and includes the entire grain with minimal processing.
- Characteristics: This type of leather retains the natural imperfections and textures of the hide, which contributes to its strength and durability. It develops a patina over time, which is a weathered, glossy layer that adds to its aesthetic appeal.
- Uses: Due to its durability and luxurious appearance, full grain leather is commonly used in high-end products like quality furniture, footwear, and fashion accessories.
2. Genuine Leather:
- Description: Genuine leather, despite what the name might imply, is not the highest quality of leather. It generally comes from the layers of hide that remain after the top is split off for the higher grades of leather.
- Characteristics: This leather is thinner and more flexible than full grain leather. It is often treated and pigmented to cover imperfections. Over time, it may wear out or peel, unlike full grain leather, which ages well.
- Uses: Genuine leather is widely used in mid-range products including bags, shoes, and jackets, where cost considerations are paramount but a real leather product is desired.
3. Top Grain Leather:
- Description: Top grain leather is the second highest quality of leather, made from the layer below the very outermost surface of the hide. The top layer is sanded to remove imperfections, making it more uniform.
- Characteristics: It is more pliable and thinner than full grain leather due to the sanding process. Top grain leather can be treated to create a smooth, even surface, which is less breathable compared to full grain.
- Uses: It’s commonly used in high-end leather products that require a more uniform finish, like luxury handbags and wallets.
4. Bonded Leather:
- Description: Bonded leather is made from the scraps and fibers left over from processing high-quality hides, which are then bonded together using polyurethane or latex on top of a fiber sheet.
- Characteristics: The least durable form of leather, it often contains a small percentage of actual leather. It's easy to manufacture and can mimic the appearance of higher quality leather at a much lower cost.
- Uses: Often used in furniture and bookbinding for a cost-effective leather look.
Why Choose Full Grain Leather?
Choosing full grain leather means investing in longevity, quality, and aesthetic appeal. Full grain leather not only lasts longer but also improves in appearance over time, developing a distinctive patina that is highly valued in leather goods. It remains the top choice for those seeking the best in durability and style, making it ideal for high-quality, luxury leather products. For a business like yours that sells only full grain leather, emphasizing these qualities helps highlight the superior craftsmanship and value of your products compared to those made with other types of leather.
Important information
Due to the nature of this material, you may occasionally find minor imperfections such as small punctures or natural leather defects. These characteristics add to the uniqueness and authenticity of each piece.
Achieving Perfect Adhesion Heat Pressing Leather Patches on Hats with a Single Heat Plate Machine
Materials Needed:
- Thick full-grain leather patch with PatchCrafters' heat-activated adhesive backing
- Hat (trucker, 7-panel, 5-panel, dad hat, or baseball hat)
- Single heat plate machine (like a Vevor hat press)
- PatchCrafter’s Heat Dualizer (Get Yours Here!)
- PressGuard Heat Press Patch Protector by PatchCrafters (Buy Now!)
- Timer or stopwatch
- Clean, flat pressing surface
Step-by-Step Instructions:
- Prepare Your Heat Press Machine:
- Transform Your Heat Press with the PatchCrafter’s Heat Dualizer:
- Preheat the Hat:
- Position the Patch for Pressing:
- Protect Your Patch with the PressGuard Heat Press Patch Protector:
- Press the Patch:
- Check the Adhesion:
- Allow to Cool:
- Final Inspection:
Additional Tips:
- Enhance Your Press with the Heat Dualizer: The PatchCrafter’s Heat Dualizer is specifically designed to transform single heat plate machines like the Vevor hat press. By adding adjustable heat to the bottom plate, it ensures both sides of the patch receive consistent heat, reducing the risk of creasing and improving adhesion. Order your Heat Dualizer today to elevate your hat patch production!
- Protect the Leather’s Finish with the PressGuard: Use the PressGuard Heat Press Patch Protector to prevent scorching and maintain the perfect appearance of your leather patches. It provides an even heat distribution, ensuring your patches look professional and clean. Get your PressGuard now!
- Run Test Presses: Every leather type may respond differently to heat and pressure. Use scrap pieces to test and adjust settings for optimal results.
- Regularly Clean Your Heat Press: Keep your machine clean and well-maintained to prevent residue buildup that could impact heat distribution or adhesive quality.
By following these steps and optimizing your setup with the PatchCrafter’s Heat Dualizer and PressGuard Patch Protector, you’ll achieve professional, high-quality results every time when pressing thick full-grain leather patches onto hats!
Full-Grain Leather Patches
What is the recommended method for heat pressing full grain leather patches?
When working with leather panels that come with PatchCrafters adhesive already applied, the application process is simplified, ensuring a secure and aesthetically pleasing finish on your custom hats. Follow the instructions below, tailored to the type of heat press you are using, to achieve the best results.
Single Heat Plate Press (e.g., Vevor):
Important Advisory: Due to the thickness of our premium leather panels, single heat plate press machines may struggle to fully activate the adhesive. The leather acts as an insulator, reducing heat transfer from the top plate. For optimal results, we recommend testing your press settings and adjusting them as needed to ensure sufficient heat reaches the adhesive.
Initial Press: Press the hat for 45 seconds at 300°F to prepare the fabric, ensuring it is ready for the adhesive to bond.
Applying the Panel: Position the leather panel where you want it on the hat. Apply the heat press again at 300°F for 45 seconds. Check the bond and if necessary, repeat for an additional 10-15 seconds or increase the pressure to help compensate for the heat insulation.
Pre-heat the Bottom Plate: To improve heat distribution, we recommend pre-heating the bottom plate for 4 minutes before you begin. Simply press the machine without any garment or panel in place. This allows the foam to absorb heat, compensating for the top plate's limited ability to penetrate thicker leather panels.
Double Heat Plate Press (e.g., Hotronix 360 IQ, Chinese Model):
- Option 1: Adjust the top plate to between 270°F and 290°F and the bottom plate to between 300°F and 320°F. Press with medium pressure for 45 seconds. This method is effective for a strong and even bond.
- Option 2 (Double Press Method): First, apply heat for 30 seconds to preheat the area. Then, place the leather panel and apply a second heat application for 20-25 seconds to secure the panel in place.
Important Considerations:
- The patches should be completely dry before application. Moisture can interfere with the effectiveness of the adhesive.
- If the panel does not adhere properly after the first press, it may need slightly more heat. Adjust the temperature or duration as necessary based on your initial outcome.
These guidelines are designed to facilitate a seamless application process for our leather panels with pre-installed adhesive, ensuring your custom hat projects are both enjoyable and successful. As always, should you need further assistance or have questions about your specific project, our dedicated customer support team is here to provide personalized support and advice.
Achieving Perfect Adhesion Heat Pressing Leather Patches on Hats with a Single Heat Plate Machine
Genuine leather varies greatly in its reaction to laser engraving, so finding the right settings involves experimentation. Start with your machine's settings for organic materials as a baseline. Use a low power setting initially, as leather can burn easily, and increase power incrementally during your tests. Speed settings should be adjusted based on the power adjustments to achieve the desired effect, whether it's surface marking or a deeper cut. Always test on a piece of leather similar to your project material, adjusting for the leather's color, thickness, and type. Observing the effects of these adjustments will guide you to the perfect settings for your specific leather.
Heat Dualizer
User Guide for Hat Pressing
1. Preparing the Hat:
- Preheat the Hat: Always preheat the hat for 30 seconds to eliminate moisture and smooth out any wrinkles. This step is crucial to ensure a clean, even surface for proper patch adhesion.
2. Temperature Settings:
- Top Plate: Start at 260°F.
- Bottom Plate: Set to 280°F.
These temperatures work best for leatherette patches, but you may need to fine-tune them depending on the thickness or type of patch (e.g., embroidered or leather patches).
3. Patch Application:
- Align the Hat and Patch Properly: Ensure that both the hat and patch are perfectly aligned with the top and bottom plates of the press to avoid uneven pressure or shifting during pressing. Correct alignment is key to getting professional results.
- Use the PressGuard: The PatchCrafters PressGuard is a must-have accessory to protect both your patch and hat during the pressing process. It serves as a heat-resistant, non-stick barrier that prevents scorching or heat marks on the patch, while also ensuring even heat distribution across the surface. Using the PressGuard is particularly important when pressing heat-sensitive patches or working with delicate hat materials.
- Pressing Procedure: Press for 30 seconds with moderate pressure. Excessive pressure can cause creasing and distort the hat’s shape. Focus on applying enough pressure to secure the patch without over-compressing the fabric, which can deform structured hats like trucker caps. The moderate pressure ensures a smooth and professional bond.
4. Ensure Patches Are Completely Dry Before Pressing:
- Dry Patches: It’s critical that your patches are fully dry before heat pressing. Any moisture in the patches can affect adhesion, resulting in weak bonding. If your patches have been cleaned or washed recently, allow them to dry for at least 24 hours before pressing.
5. Post-Press Care:
- Test and Adjust: Every patch material is different, so it’s always a good idea to test the temperature and pressure settings on one or two hats before committing to a larger batch. Fine-tune the settings to match the patch material for the best results.
- Pressing Thick Patches: The dual-heat technology of the Heat Dualizer makes it ideal for thicker patches. Bottom heat ensures the adhesive penetrates evenly, especially with dense materials like leather or embroidery, helping achieve a flawless, strong bond even on stiff or structured hats.

