
Thick Leatherette Sheet - Rawhide / Black
Experience the extraordinary Leatherette Sheets by Patch Crafters, a synthesis of impeccable quality and exceptional performance! With a remarkable thickness of 1.85 mm, this product surpasses conventional standards, providing unparalleled strength and unmatched reliability.
Precision-engineered to ensure maximum safety in customizations, our leather is laser machine-compatible, offering limitless possibilities for your personalizations.
Get ready for a unique customization experience, as Patch Crafters leather comes equipped with an exceptionally high-quality thermal adhesive, ensuring practicality and confidence in every project. Turn your ideas into reality with Patch Crafters - the superior choice for exceptional customizations!
Important Details Before You Order
Review key details about material thickness, adhesive options, laser use, application, and production workflow before placing your order.
How to mitigate burning residue on your patch?
In order to mitigate residue you may lower your air assist at it’s minimum or basically zero while engraving and turn back on when cutting. Also try to adjust the power to not over burn, and only remove the top layer exposing the black layer behind. If you burn too deep, you produce much more residue.
By lowering the air assist and producing minimal burning you should have almost zero to clean because all the soot will basically vaporize and won’t get stuck to the leatherette
What is the recommended method for attaching leatherette patches to garments using a heat press?
For optimal application of leatherette patches on hats, it's crucial to adjust your technique based on the type of heat press you're using. Below, we provide tailored instructions for both single and double heat plate presses, ensuring your patches adhere perfectly to the garment.
Single Heat Plate Press (e.g., Vevor):
- Initial Press: Start by pressing the hat for 30 seconds at 300°F. This initial layer of heat prepares the fabric for the patch application.
- Applying the Patch: Place the leatherette patch on the pre-heated area and press again at 300°F for 25 seconds. This ensures the patch adheres well to the garment.
Double Heat Plate Press (e.g., Hotronix 360 IQ, Chinese Model):
- Option 1: Set the top plate to a temperature between 270°F and 290°F and the bottom plate to between 380°F and 400°F. Apply medium pressure for 45 seconds. This single-step method is efficient for a strong bond.
- Option 2 (Double Press Method): For an alternative approach, first apply heat for 30 seconds to warm up the patch area. Then, place the patch and apply a second round of heat for 20-25 seconds. This method can enhance the adhesive's activation.
Important Notes:
- Ensure the patches are completely dry before application. High moisture levels can affect the heat transfer process.
- If the patch doesn't stick after the first heat application, it may require a bit more heat. Adjust accordingly based on your initial results.
Are there better results engraving metal backing leatherette with a fiber laser compared to a CO2 laser?
Understanding the Lasers:
CO2 Lasers:
Technology: CO2 lasers use a gas mixture (predominantly carbon dioxide) stimulated electrically to produce a laser with a wavelength of about 10.6 microns. This type of laser is highly effective on non-metal materials.
Engraving Characteristics: CO2 lasers are excellent for a broad range of non-metal materials including leather, wood, and plastics. They provide high-quality engravings with fine detail on leatherette. However, they can struggle with consistency when used to engrave leatherette with metal backing, as they are not inherently suited for metal interaction.
Fiber Lasers:
Technology: Fiber lasers use an optical fiber doped with rare-earth elements, generating a laser beam at about 1.06 microns, significantly shorter than that of CO2 lasers.
Engraving Characteristics: Fiber lasers are particularly precise in their ability to remove the top layer of materials without affecting underlying layers. In the context of leatherette with a metal backing, fiber lasers can finely remove the leatherette layer, precisely exposing the metal backing without physically engraving the metal itself.
Comparing Results on Metal Backing Leatherette:
Exposing Metal Backing: Fiber lasers are ideally suited for projects where the goal is to expose the metal backing of leatherette. They do this by precisely and cleanly removing the top layer of leatherette, revealing the metal beneath with excellent accuracy and minimal damage to the metal.
Precision and Consistency: Fiber lasers provide a consistent result when exposing the metal backing through the leatherette, which can be challenging with CO2 lasers. CO2 lasers, while excellent for engraving leatherette itself, can produce less consistent results when trying to expose the metal backing due to their lack of precision in depth control.
Which Laser to Choose?
Project Requirements: If the primary goal is to create detailed designs by precisely exposing the metal backing under leatherette, a fiber laser is more suitable. It ensures cleaner, more consistent results without the risk of irregularities that might occur with a CO2 laser in such specific applications.
Overall Performance: For general engraving on leatherette without metal backing, a CO2 laser remains an excellent choice. However, for composite materials like leatherette with a metal backing where precise layer removal is required, the fiber laser's capabilities make it the superior option.
In summary, while both types of lasers have their strengths, fiber lasers are particularly adept at projects involving leatherette with a metal backing where precision in exposing the metal is crucial. Their ability to finely remove the top layer without altering the metal underneath provides enhanced results and greater control over the final appearance of the engraved product.
How should I determine the optimal engraving settings for leatherette?
When engraving leatherette, the key is to start with your machine's recommended settings for synthetic materials and adjust from there.
Begin with a moderate speed and a low to medium power level to prevent burning or excessive melting. Conduct a series of test engravings on a scrap piece of leatherette, gradually adjusting the power and speed until you achieve a clear, sharp engraving without damaging the material
Pay attention to the contrast and depth of the engraving, aiming for a balance that highlights your design while preserving the integrity of the leatherette.
How to Achieve Consistent Engraving on Leatherette with Metal Backing?
Achieving consistent quality in the engraving of leatherette materials, especially those with a metal backing, requires careful attention to detail in both preparation and the engraving process itself. Here are the steps to mitigate inconsistency and enhance the precision of your engravings:
- Group Engraving Strategy: When setting up your engraving rows, opt for the "fill groups together" option rather than engraving each row individually. This method promotes uniformity across the engraving area by maintaining consistent engraving conditions for each group.
- Adjusting Focus: Slightly defocusing the laser by approximately 1/8" can significantly reduce inconsistencies in the engraving depth and coloration. This adjustment broadens the laser's impact area, leading to a more uniform application across different parts of the leatherette.
- Leveling the Material: Ensuring that the material is perfectly level relative to the laser nozzle is crucial. The entire surface of the leatherette, especially with a metal backing, must be equidistant from the laser to maintain a consistent focal range throughout the engraving process. This step is paramount, as even minor discrepancies in focal range can lead to notable variations in the quality of the engraving.
- Understanding Power Variations: Be mindful of the laser power settings. Even slight adjustments in power (as minimal as 1%) can transition the appearance from shiny to dull, underscoring the sensitivity of the material to these changes. This sensitivity illustrates how critical precise control over the laser's power is to achieving the desired finish.
- Focal Distance Considerations: Just as variations in power settings can have a pronounced effect on the outcome, alterations in the focal distance between the laser and the material play a similar role. Ensuring a stable and consistent focal distance is key to avoiding the common pitfalls seen in engraving projects.
- Practice and Precision: Dialing in the exact settings for two-tone leatherette requires practice and a keen eye for detail. Since each material can respond differently, it's advisable to test these settings on a sample piece before proceeding with the final project.
By incorporating these steps into your engraving process, you will significantly reduce the risk of inconsistencies and enhance the overall quality of your engravings on leatherette with metal backing. Remember, the goal is not just to achieve a level surface in the traditional sense but to ensure that the engraving surface is uniformly level in relation to the laser's nozzle, thereby guaranteeing a consistent focal range across the entire piece.
Are there any toxic fumes released when engraving leatherette materials?
We understand the importance of safety in your crafting projects, which is why we assure our customers that no toxic fumes are released when engraving our leatherette materials.
Our leatherette is specifically designed to be laser-cut and engraved safely, without the emission of harmful toxins. This makes it an excellent choice for both hobbyists and professionals seeking a reliable and safe material for their creative endeavors. As always, we recommend engraving in a well-ventilated area to ensure the best working environment.
Enjoy crafting with peace of mind knowing that your health and safety are protected.
Can I use a diode laser to cut and engrave leatherette materials without any problems?
Absolutely! Diode lasers are fully capable of both cutting and engraving our leatherette materials efficiently and precisely. When setting up your diode laser, it’s important to adjust the laser settings to suit the specific thickness and color of the leatherette to achieve the best results.
For cutting: Start with moderate power settings and adjust based on the material’s response. Perform a test cut to ensure that the laser cleanly slices through the leatherette without burning or leaving ragged edges.
For engraving: Lower the power and increase the speed to etch designs into the leatherette without penetrating through the material. Testing different settings will help you find the perfect balance for detailed and crisp engravings.
Please note that diode lasers may struggle with certain colors, such as those with reflective or metallic backings like our black/silver leatherette. In some cases, cutting these colors may not be possible, even with adjustments to power and speed settings. We recommend using an alternative cutting method for these materials if needed.
Always make sure your laser is properly focused, and the leatherette is securely flat on the cutting bed to maintain consistency across your project. With proper setup and adjustment, diode lasers provide excellent versatility and precision for both cutting and engraving leatherette, enabling you to create detailed and high-quality designs.
Why is there a white backing color showing on my leatherette after engraving, and is this normal?
Seeing a white backing color appear on your leatherette after engraving can be surprising, but it is a common occurrence when the laser power is not set high enough to penetrate the top layer completely. This effect results from the laser lightly etching the surface without fully exposing the underlying darker layer, which is typically what you aim for in a finished product.
To help you find the ideal power setting for your engraving projects, conducting a material test is highly recommended. As demonstrated in the material test image provided by one of our customers, adjusting the laser's power creates a gradient effect from white to fully exposed black. Starting at lower power and gradually increasing, you can visibly observe how the laser transitions from etching the surface to revealing the darker material beneath. This test is an excellent method for determining the minimum power required to achieve your desired engraving depth and color.
Material Test Example: The included image shows a clear gradient of color change, indicating different power settings. Notice how the lighter areas represent insufficient power, resulting in an incomplete transition through the leatherette's top color layer, while the darker areas show successful exposure of the underlying material.
Using this approach allows you to dial in the perfect settings for your specific leatherette material, ensuring that every engraving comes out with the clarity and depth you desire. Remember, each laser machine may behave slightly differently, so these tests are crucial for achieving consistent and professional results in your crafting projects.
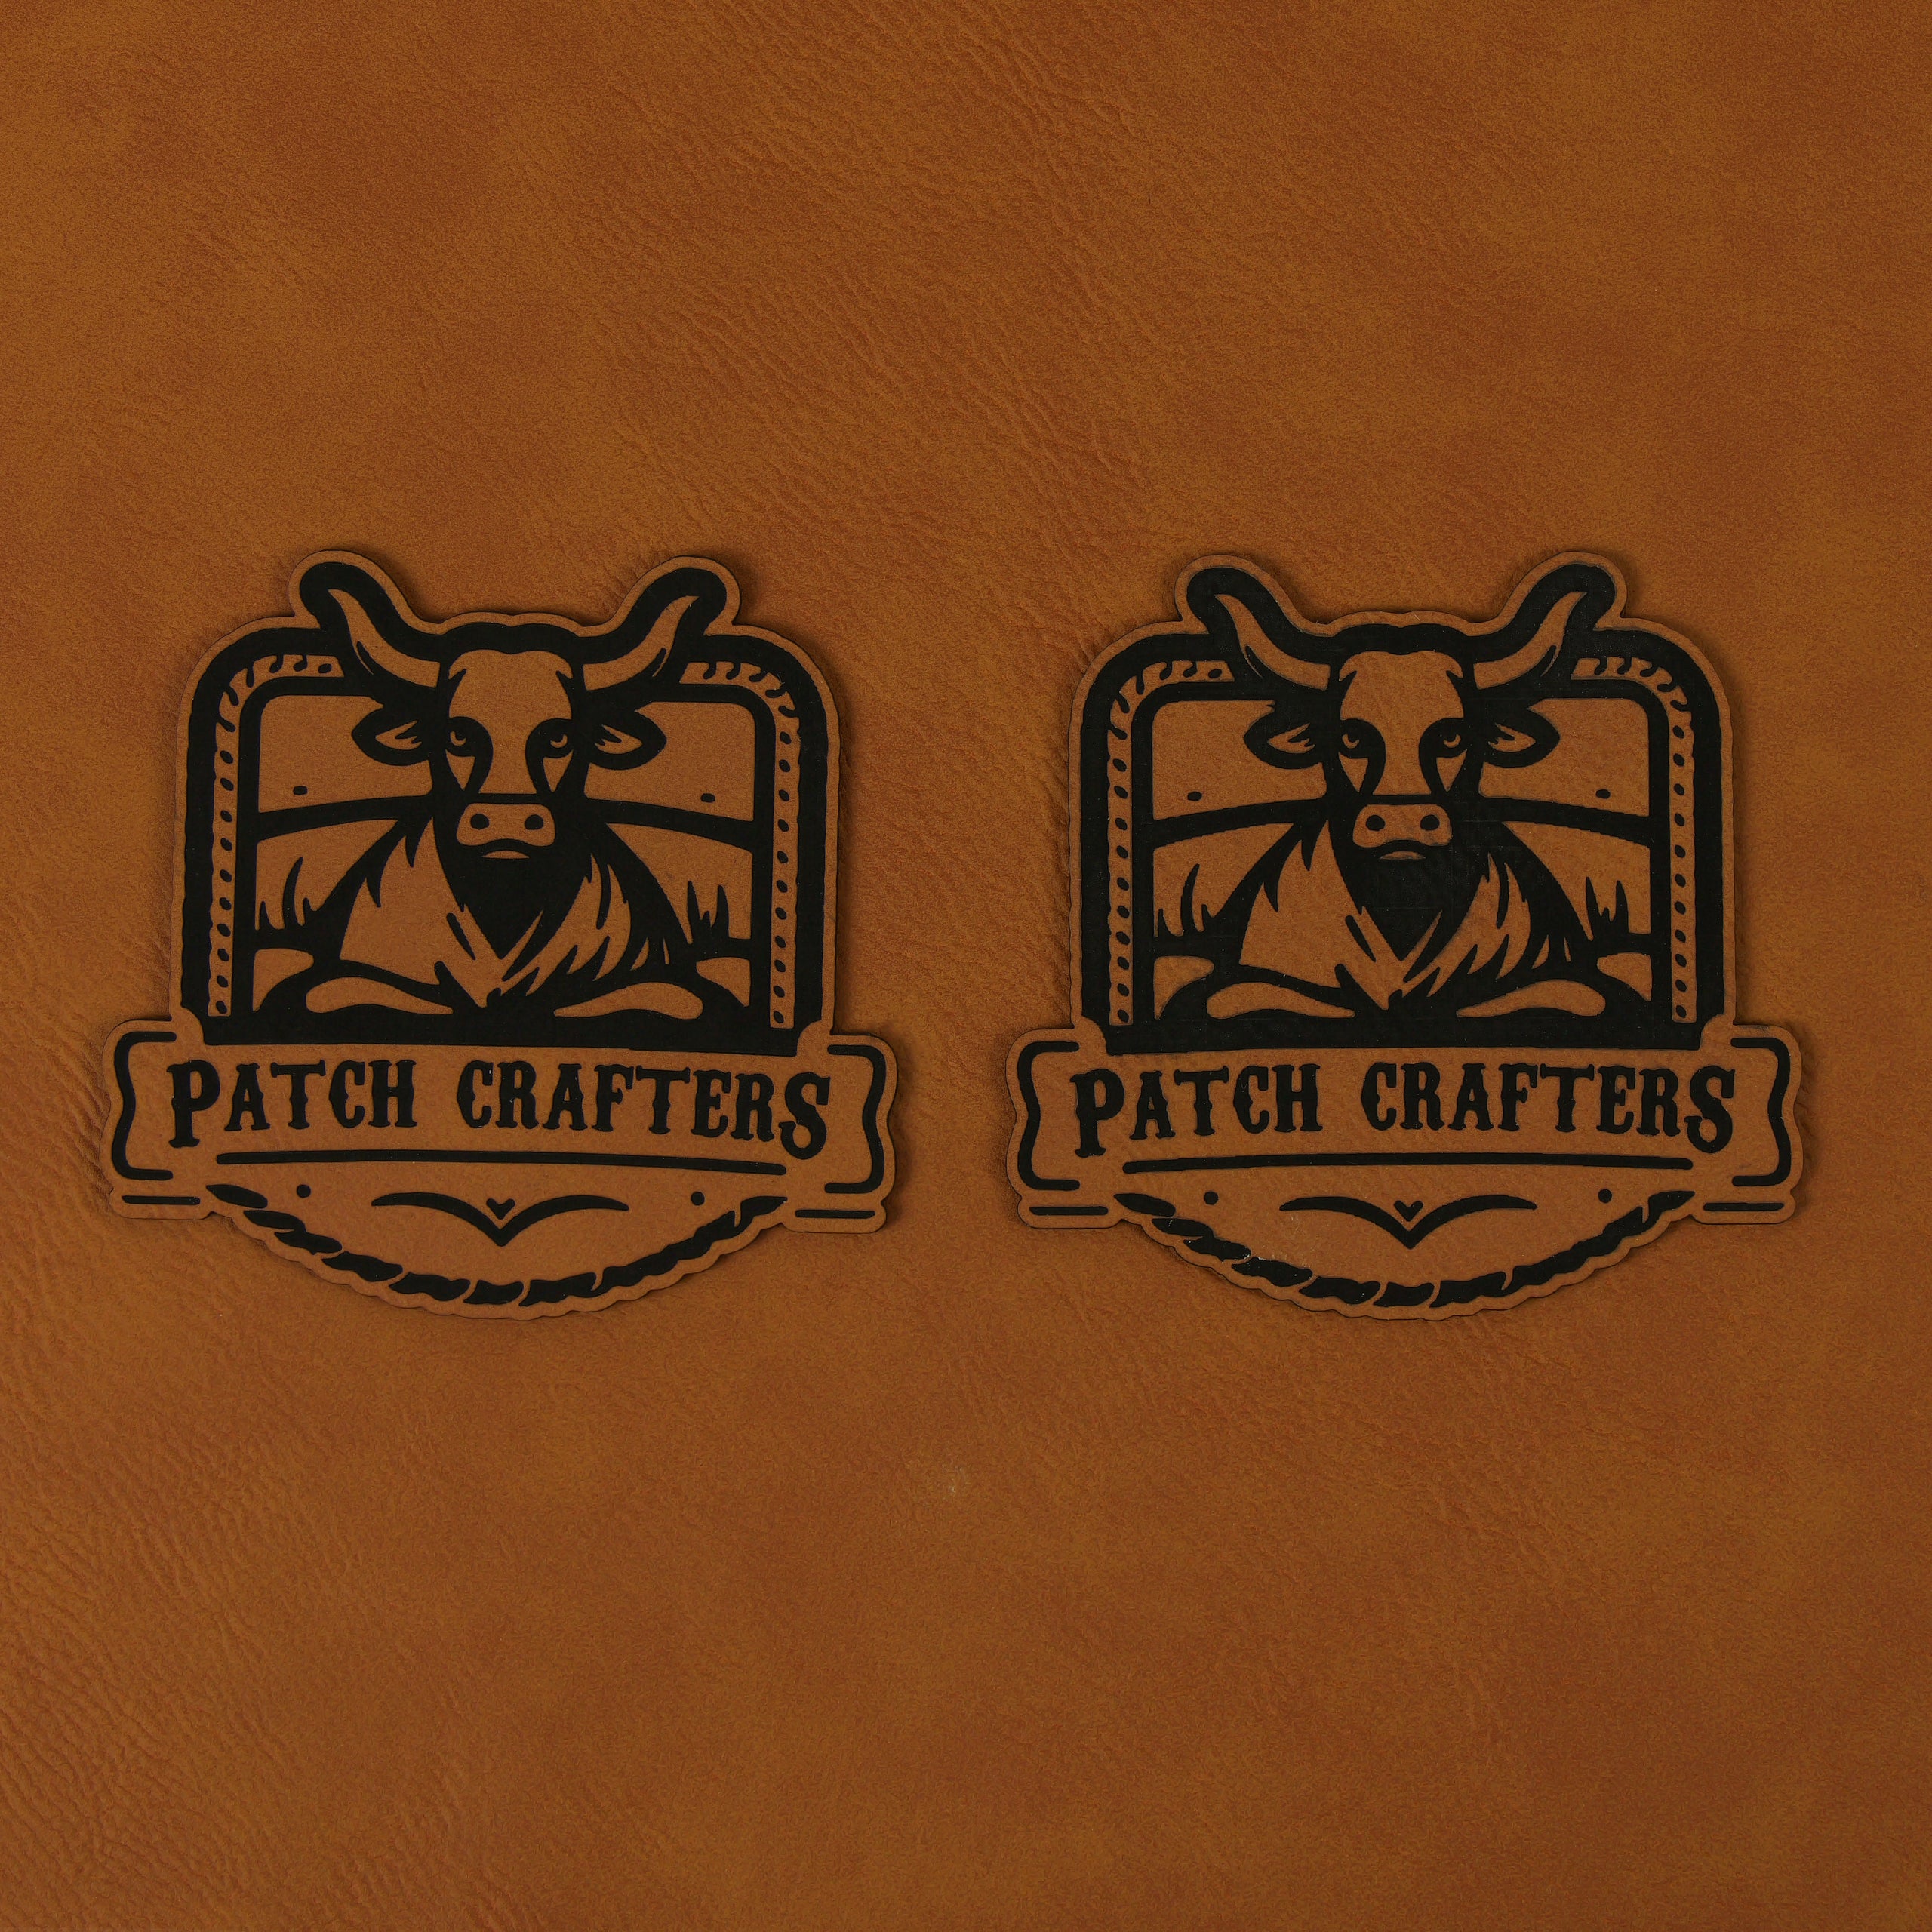
Made for Clean Custom Work
Create patches, labels, accessories, and branded products with a thick leatherette material built for laser engraving, clean cutting, and consistent production.
Adhesive Option Available
Choose adhesive-backed sheets to simplify patch production and heat press application.
Laser-Ready Surface
Designed for engraving and cutting, giving makers a clean base for detailed custom work.
Built for Production
The thicker 1.85 mm construction gives each finished piece a more substantial, professional feel.
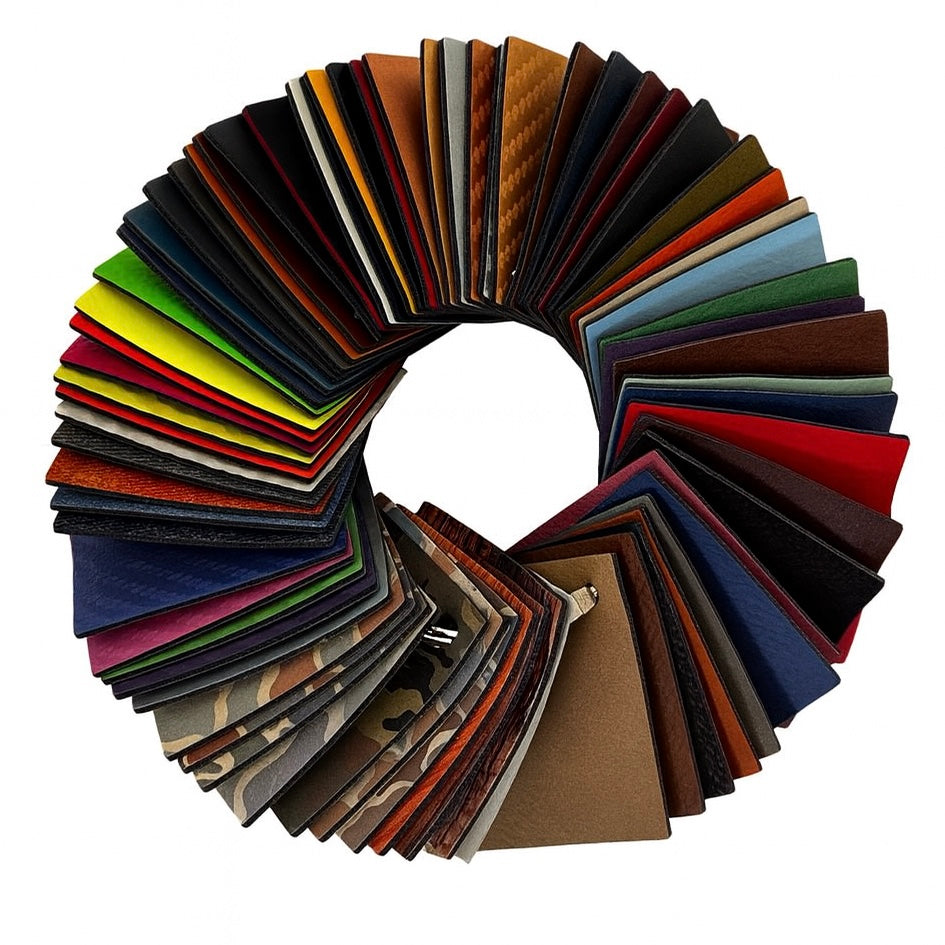
Choose With Confidence
See every leatherette color, texture, and finish up close before selecting full-size sheets for your production workflow.