

Full-Grain Leather Panel - Olive Green
Thick by design: about 2.2 mm genuine leather
For the best bond, press patches with heat on top and bottom, like the DuoForge. How to press
Premium Full-Grain Leather Panels – Heat-Activated Adhesive Backing
Our 100% vegetable-tanned, full-grain leather panels are made for patch makers. The leather is about 2.2 mm thick on purpose: that depth gives your patches a deep engraving, a solid feel and a premium look. Leather insulates, so we recommend pressing patches with a dual-heat press like the DuoForge, or adding the Heat Dualizer to a top-heat press. The acrylic top coat keeps laser residue on the surface, and it cleans with isopropyl alcohol.
Laser-safe and PVC-free: genuine full-grain leather with no vinyl or PVC coating and no PVC in the adhesive.
IMPORTANT — PLEASE READ:
⚠️ THICKNESS NOTICE:
This leather is fairly thick and may be challenging to cut with low-wattage lasers. We recommend using a higher-powered CO₂ laser or engraving-only setups when working with these panels. There may be slight variations in leather thickness from one piece to another. If you are using a low-wattage laser cutter, you may experience difficulty cutting through this material consistently. We recommend using at least 60w laser to cut the material.
⚠️ HEAT PRESS RECOMMENDATION:
We strongly recommend using a dual-heat press like the DuoForge, or adding our Heat Dualizer, to ensure heat is applied from both the top and bottom of the patch. Leather is a strong insulator and can prevent single-plate machines from delivering enough heat to properly activate the adhesive.
⚠️ NATURAL IMPERFECTIONS:
Genuine leather is never perfect. Expect minor natural marks, small scars, or punctures. These are not defects, but part of what makes each piece unique and authentic.
⚠️ THICKNESS VARIATION:
Panels are hand-selected and cut to size, but slight variations in thickness may occur between pieces. This is a natural result of working with full-grain leather.
⚠️ COLOR VARIATION:
Colors may vary slightly from batch to batch and from photos shown.
🔥 What’s New:
-
Acrylic Top Coat: A sleek new finish makes post-engraving cleanup effortless—wipe it with a soft cloth dampened with isopropyl alcohol for a clean, professional look. For extra sheen, an acrylic leather finish such as Resolene is optional.
-
Improved Heat Resistance: Engineered to withstand heat pressing without burning, warping, or discoloration—perfect for laser engraving and patch application.
-
Deeper Color, Richer Character: Advanced dyeing processes deliver enhanced color saturation and a more uniform finish across every panel.
🌿 Authentic Leather, Naturally Unique
We proudly hand-select each hide to maintain consistent quality, but as with all genuine leather, minor imperfections such as small scars, marks, or slight thickness variations may be present. These natural features are not defects—they’re proof of authenticity and add character to your final product. No two panels are exactly alike.
🛠️ Made for Makers
-
Thickness: about 2.2 mm, thick on purpose for deep engraving and premium leather patches.
-
Backed with Heat-Activated Adhesive: Our exclusive Patch Crafters adhesive ensures strong, lasting bonds during heat pressing.
-
Laser Compatibility: Thicker leather may be challenging for low-wattage lasers. For best results, use a higher-powered CO₂ laser or engrave without full cuts.
Whether you're crafting premium leather patches or building standout products, these panels combine beauty, resilience, and ease of use—elevating your work with every piece.
Read before you press
Thick on purpose: about 2.2 mm of genuine leather
Our full-grain leather is about 2.2 mm thick. That depth is what gives a leather patch its deep engraving, its weight in the hand and its premium look. It also slows heat down, so the press you use to apply the patches matters.
- ≈ 2.2 mm Genuine full-grain leather About as thick as three credit cards stacked. Slight variation from piece to piece is natural.
- Top + bottom Heat from both sides Leather insulates. A press that also heats from inside the hat, like the DuoForge, bonds it best.
- With Adhesive Adhesive option Choose With Adhesive and our Patch Crafters heat-activated adhesive comes already on the back.
- Acrylic coat Stain-resistant finish Laser residue stays on the surface and wipes off with isopropyl alcohol.
We recommend a dual-heat press
A top-heat-only press has to push its heat through 2.2 mm of leather before it reaches the adhesive. Leather is a strong insulator, so the adhesive may not fully activate and the leather edges can lift. A press that heats the top and the bottom warms the adhesive from the hat side too, for a faster, more even bond.

How to press patches made from this leather
For panels bought With Adhesive. Pick your press. Every setting is a starting point: test on a sample cap first, since caps and presses vary.
DuoForge: 300°F top, 320°F bottom
- Set the top platen to 300°F and the bottom to 320°F.
- Pre-heat the cap for 25 seconds.
- Place the patch with the adhesive film against the cap. Don't peel the film.
- Press the patch for 25 seconds.
Other dual-heat cap presses: 270–290°F top, 300–320°F bottom
- Set the top platen to 270–290°F and the bottom to 300–320°F.
- Place the patch with the adhesive film against the cap. Don't peel the film.
- Press for 45 seconds at medium pressure.
Top-heat-only cap press: 300°F
- Set the press to 300°F.
- Pre-heat the cap for 45 seconds.
- Place the patch with the adhesive film against the cap. Don't peel the film.
- Press the patch for 45 seconds, adding 10–15 seconds if needed.
This is the hardest setup for 2.2 mm leather, and bonds are less consistent. For reliable results use a dual-heat press, or add the Heat Dualizer to your press.
The cap and the patch should be completely dry before pressing. Still not bonding? Text us at (405) 937-1596, Mon–Sat, 8am–6pm CT. Full chart: hat patch heat press settings.
Acrylic top coat: easier to keep clean
Our leather has an acrylic finish on the surface. It's one of the things that sets patches cut from this leather apart:
- Resists stains. The finish seals the grain, so marks don't settle into the leather.
- Laser residue stays on top. The smoke and residue from engraving don't soak into the leather.
- Cleans with isopropyl alcohol. After engraving, wipe the surface with a soft cloth dampened with isopropyl alcohol.
Optional finishing touch: a coat of acrylic leather finish, such as Resolene, adds a final sheen that makes the patch look even richer. It's not required.
Thickness, pressing and care: quick answers
How thick is this leather?
About 2.2 mm. It is genuine full-grain leather, kept thick on purpose for a deep engraving and a premium look. Thickness can vary slightly from piece to piece, as with all natural leather.
Can I use a top-heat-only press?
It can work, but it is the hardest setup for thick leather, because the heat has to pass through 2.2 mm of leather to reach the adhesive. Use 300°F, pre-heat the cap for 45 seconds, then press the patch for 45 seconds, adding 10–15 seconds if needed. For reliable bonds we recommend a dual-heat press like the DuoForge, or adding the Heat Dualizer to your press.
Do the panels come with adhesive?
Choose With Adhesive and the panel comes with our Patch Crafters heat-activated adhesive already on the back, with no liner: the film is the adhesive, so do not peel it off. NO Adhesive panels are bare leather.
How do I clean the leather after engraving?
Wipe the surface with a soft cloth dampened with isopropyl alcohol. The acrylic top coat keeps laser residue on the surface, so it comes off easily.
Do I need to apply a leather finish?
No. The acrylic top coat already protects the surface. If you want extra shine, an acrylic leather finish such as Resolene adds a final sheen.
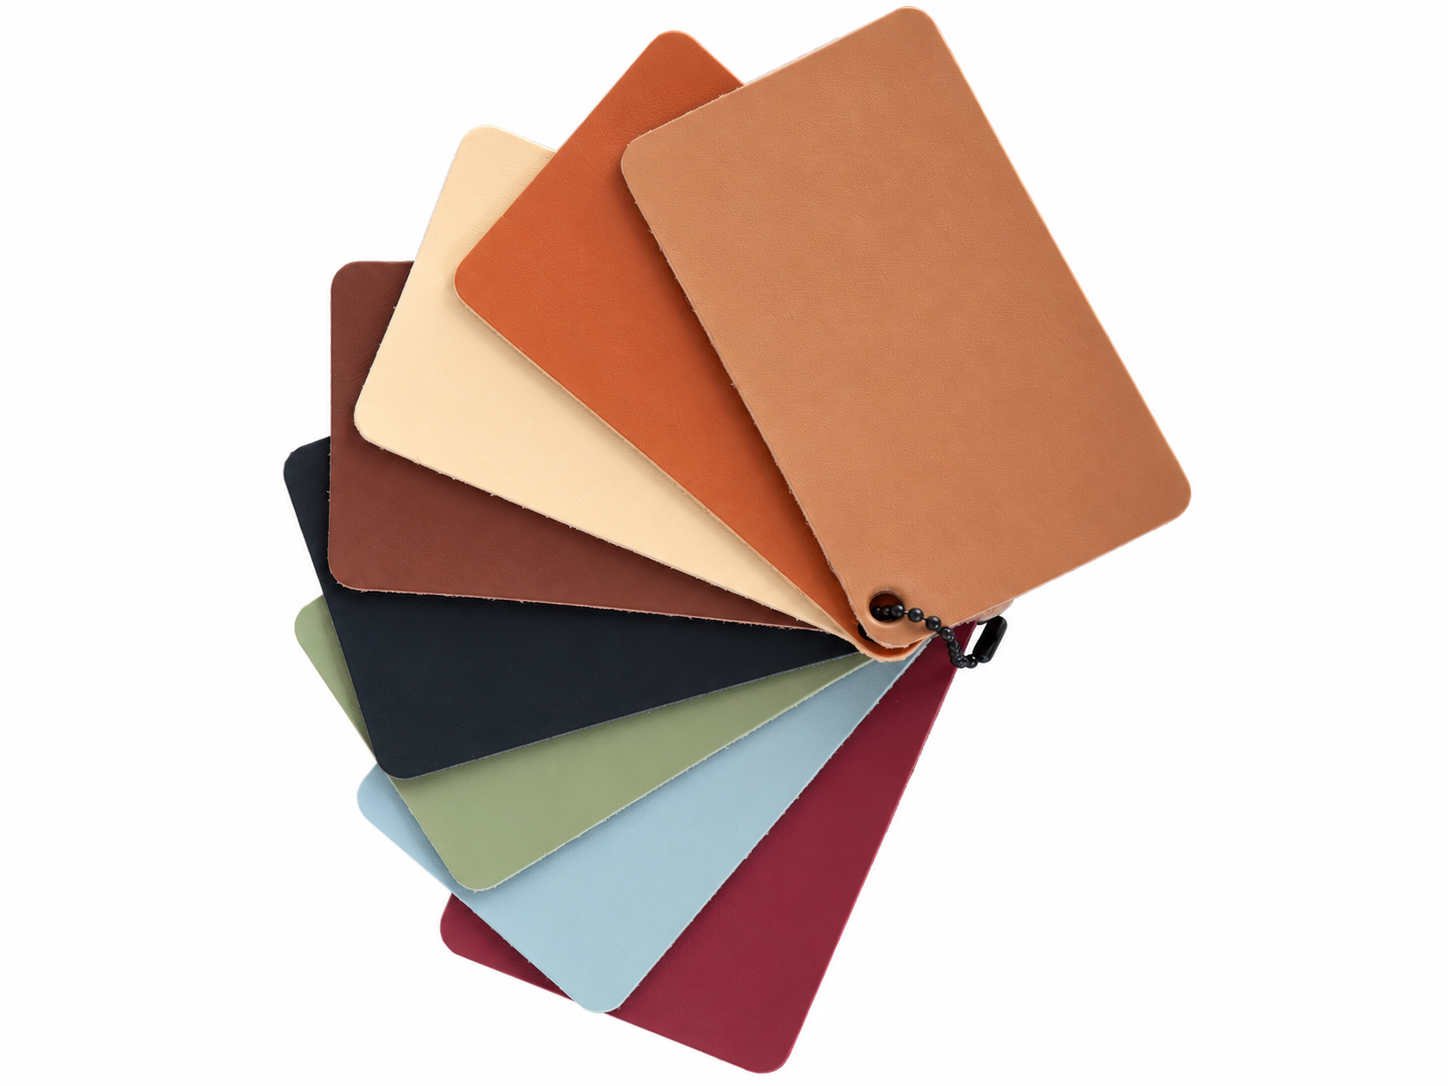
Want to test our premium leather first?
Experience the quality, texture, and engraving results before committing to full panels.
Important details before you order
Thickness notice:
This leather is fairly thick and may be challenging to cut with low-wattage lasers. We recommend using a higher-powered CO₂ laser or engraving-only setups when working with these panels. There may be slight variations in leather thickness from one piece to another. If you are using a low-wattage laser cutter, you may experience difficulty cutting through this material consistently. We recommend using at least 60w laser to cut the material.
Heat press recommendation
We strongly recommend using a DuoForge or adding our Heat Dualizer to ensure heat is applied from both the top and bottom of the patch. Leather is a strong insulator and can prevent single-plate machines from delivering enough heat to properly activate the adhesive.
Natural imperfections
Genuine leather is never perfect. Expect minor natural marks, small scars, or punctures. These are not defects, but part of what makes each piece unique and authentic.
Thickness variation
Panels are hand-selected and cut to size, butslight variations in thicknessmay occur between pieces. This is a natural result of working with full-grain leather.
Made for Makers
Backed with Heat-Activated Adhesive: Our exclusive Patch Crafters adhesive ensures strong, lasting bonds during heat pressing.

Laser Compatibility
Thicker leather may be challenging for low-wattage lasers. For best results, use a higher-powered CO₂ laser or engrave without full cuts.
Acrylic Top Coat
A stain-resistant acrylic finish keeps laser residue on the surface. After engraving, wipe it clean with isopropyl alcohol on a soft cloth.
Improved Heat Resistance
Engineered to withstand heat pressing without burning, warping, or discoloration—perfect for laser engraving and patch application.
Frequently asked questions
All Sheets come with Our Patch Crafters Heat Activated Adhesive
Every sheet you choose is primed for perfection, already equipped with our exclusive PatchCrafters heat-activated adhesive, ready to turn your creative visions into durable realities.
How do I apply leather patches with a heat press?
Leather panels bought With Adhesive come with our Patch Crafters heat-activated adhesive already on the back. Our leather is about 2.2 mm thick and leather is a strong insulator, so we recommend a press with heat on the top and the bottom, like the DuoForge, or adding the Heat Dualizer to your press. Every setting is a starting point: test on a sample cap first, since caps and presses vary.
DuoForge: 300°F top, 320°F bottom. Pre-heat the cap for 25 seconds, then press the patch for 25 seconds.
Other dual-heat cap presses: 270–290°F top, 300–320°F bottom. Press the patch for 45 seconds at medium pressure.
Top-heat-only cap press: 300°F. Pre-heat the cap for 45 seconds, then press the patch for 45 seconds, adding 10–15 seconds if needed. This is the hardest setup for thick leather and bonds are less consistent.
- Place the patch with the adhesive film against the cap. The film is the adhesive, so don't peel it off.
- The cap and the patch should be completely dry before pressing.
- Still not bonding? Text us at (405) 937-1596, Mon–Sat, 8am–6pm CT.
See the full hat patch heat press chart.
What approach should I use to find the correct engraving settings for leather?
Genuine leather varies greatly in its reaction to laser engraving, so finding the right settings involves experimentation. Start with your machine's settings for organic materials as a baseline. Use a low power setting initially, as leather can burn easily, and increase power incrementally during your tests.
Speed settings should be adjusted based on the power adjustments to achieve the desired effect, whether it's surface marking or a deeper cut. Always test on a piece of leather similar to your project material, adjusting for the leather's color, thickness, and type.
Observing the effects of these adjustments will guide you to the perfect settings for your specific leather.
Are these leather panels safe to laser engrave? Are they PVC-free?
Yes. Our full-grain, vegetable-tanned leather panels are PVC-free: there's no vinyl or PVC coating and no PVC in the adhesive, so they don't give off the chlorine gas that PVC releases under a laser. Our leather is 100% vegetable-tanned, a method that uses natural materials such as tree bark and other plant sources, making it environmentally friendly and safe for engraving. Unlike chrome-tanned leather, which uses chemicals such as chromium salts and can release harmful substances when heated, vegetable-tanned leather is safer and retains the natural beauty of the hide.
Educational Point: Chrome tanning is a quicker and more chemical-intensive process, providing softer leather with a wide range of colors, but it can be less eco-friendly. Vegetable tanning, on the other hand, is an age-old tradition that results in a more natural and durable leather with rich patinas that develop over time. This method is generally recognized for its minimal environmental impact and the distinctive quality it imparts to the leather.
Safety Recommendations: While our vegetable-tanned leather is safer to engrave than chrome-tanned varieties, we still recommend engraving in a well-ventilated area to ensure comfort and safety. Using proper ventilation systems will help maintain a pleasant working environment and ensure that any odors produced during the engraving process are effectively managed.
What is the difference between chrome-tanned and vegetable-tanned leather, and how does this affect the engraving process?
Tanning Methods and Their Differences:
- Chrome Tanning:
- Process: Chrome tanning uses chromium salts and other chemicals to treat the leather. This method is relatively fast, taking about a day to complete, and is popular for its ability to produce soft, uniformly colored leather with high water resistance.
- Characteristics: The leather is more supple and pliable compared to vegetable-tanned leather. It is available in a wide range of vibrant colors and has a more uniform appearance.
- Environmental Impact: While effective, chrome tanning is less environmentally friendly due to the use of heavy metals and other chemicals, which can be harmful if released into the environment.
2. Vegetable Tanning:
- Process: Vegetable tanning is an ancient and natural method that uses organic materials like tree bark, leaves, and other plant-based sources. This process is much slower, typically taking several weeks to months to complete.
- Characteristics: Vegetable-tanned leather is stiffer and can develop a rich patina over time, enhancing its aesthetic appeal. It is known for its earthy tones and natural look, and it tends to be thicker, providing a robust material for products.
- Environmental Impact: This method is considered more environmentally friendly and sustainable, largely avoiding harmful chemicals. It’s preferred for its lower environmental impact and the biodegradable nature of its waste products.
Impact on Engraving:
- Engraving Chrome-Tanned Leather:
Due to the chemical treatment and softer nature of chrome-tanned leather, engraving can sometimes lead to less precise edges, potential hardening or warping due to heat, and occasionally toxic fumes due to the breakdown of chemicals like chromium compounds, especially if the leather is not properly managed or of lower quality.
- Engraving Vegetable-Tanned Leather:
Vegetable-tanned leather offers a more stable and consistent surface for engraving, resulting in cleaner and more precise cuts. The natural fibers and absence of harsh chemicals generally make it safer to work with during the engraving process, as it does not produce harmful fumes. The robustness of vegetable-tanned leather allows for deeper and more detailed engravings without compromising the integrity of the leather.
Conclusion:
Choosing between chrome-tanned and vegetable-tanned leather for projects involving engraving depends on your specific needs for the final product's aesthetics, durability, and environmental considerations. For engraving, vegetable-tanned leather is generally preferred due to its superior response to the process and its environmental benefits.
What is the Difference Between Full Grain Leather, Genuine Leather, and Other Leather Varieties?
1. Full Grain Leather:
- Description: Full grain leather is the highest quality leather available. It is made from the outermost layer of the animal hide and includes the entire grain with minimal processing.
- Characteristics: This type of leather retains the natural imperfections and textures of the hide, which contributes to its strength and durability. It develops a patina over time, which is a weathered, glossy layer that adds to its aesthetic appeal.
- Uses: Due to its durability and luxurious appearance, full grain leather is commonly used in high-end products like quality furniture, footwear, and fashion accessories.
2. Genuine Leather:
- Description: Genuine leather, despite what the name might imply, is not the highest quality of leather. It generally comes from the layers of hide that remain after the top is split off for the higher grades of leather.
- Characteristics: This leather is thinner and more flexible than full grain leather. It is often treated and pigmented to cover imperfections. Over time, it may wear out or peel, unlike full grain leather, which ages well.
- Uses: Genuine leather is widely used in mid-range products including bags, shoes, and jackets, where cost considerations are paramount but a real leather product is desired.
3. Top Grain Leather:
- Description: Top grain leather is the second highest quality of leather, made from the layer below the very outermost surface of the hide. The top layer is sanded to remove imperfections, making it more uniform.
- Characteristics: It is more pliable and thinner than full grain leather due to the sanding process. Top grain leather can be treated to create a smooth, even surface, which is less breathable compared to full grain.
- Uses: It’s commonly used in high-end leather products that require a more uniform finish, like luxury handbags and wallets.
4. Bonded Leather:
- Description: Bonded leather is made from the scraps and fibers left over from processing high-quality hides, which are then bonded together using polyurethane or latex on top of a fiber sheet.
- Characteristics: The least durable form of leather, it often contains a small percentage of actual leather. It's easy to manufacture and can mimic the appearance of higher quality leather at a much lower cost.
- Uses: Often used in furniture and bookbinding for a cost-effective leather look.
Why Choose Full Grain Leather?
Choosing full grain leather means investing in longevity, quality, and aesthetic appeal. Full grain leather not only lasts longer but also improves in appearance over time, developing a distinctive patina that is highly valued in leather goods. It remains the top choice for those seeking the best in durability and style, making it ideal for high-quality, luxury leather products. For a business like yours that sells only full grain leather, emphasizing these qualities helps highlight the superior craftsmanship and value of your products compared to those made with other types of leather.
Important information
Due to the nature of this material, you may occasionally find minor imperfections such as small punctures or natural leather defects. These characteristics add to the uniqueness and authenticity of each piece.